Sunday 28 February 2010

Just Magnolia Challenge - Birthday Card

This weeks Just Magnolia Challenge is to create a Birthday Card, Ive used two of the new Of the Ceiling stamps, Tilda in her ladybug suite and the dog Wilma, shes carrying a rose. Ive stamped and masked them onto white card and coloured them with my copic pens. Afterwards Ive cut them out with my nestabilitie dies, and drawn around the die to create a mount, the sentiment is done in the same way.
The base card is a 8"x 8" white card, with my first layer of red pearlescent card, and one of three papers from the new Papermania pad "Rose Garden", its got some really lovely papers and I wanted to use my floral punch rose as a embellishment and felt the papers were appropriate. The first layer is a white base with rose bunches on and the next two layers are first a sort of paisley pattern and the second another rose bunch design, Ive used my heart border punch on both of these. For the last mount Ive used a piece of pink pearlescent paper and my deep heart border punch on both edges and stuck it across the middle of the other two layers and then popped some ribbon along the middle of it.
Ive then stuck my mounted image in the centre with my sentiment at the bottom on the right. Ive actually created two swirls with some pearls but they dont stand out to well in this photo, but I have also arranged some leaves in the top left hand corner and then stuck my rose on top. This was created by using a small balloon punch and moulded and then stuck firstly to a circle then build up gradually in layers to create the whole rose.

Friday 26 February 2010

One Card for Two Challenges

Todays card has been created for Mo's Challenge which is a sketch and for Cute Card Thursday which must contain ribbons and lots of, heres the sketch for Mo's Challenge
and here is my interpretation of this sketch, Ive added some ribbons which I hope wont take to much away from it.

This is the new digi stamp titled camping and I thought that the "All fired up papers" from Nitwit downloads went reasonable well with it.
Ive printed out my image and coloured it with my copic pens, then with my new Nestabilitie Label die No.12 (these Ive purchased from my very dear friend Liz of Making a Lasting Impression, she has a shop on Ebay and has most of the new dies, shes also brilliant with her turn around service) Ive created several mounts and even cut the papers and the sentiment out with the different sizes to keep the design. I actually have made a A5 card for a change.
The ribbon flower is one of the new Marianne Creatables dies, not that Im to good with the ribbon as it kept slipping while I was trying to mould it into the five star shape, in the end I resorted to using a needle and thread to keep it in place then popped a pearl brad through the middle and attaching it to the flower cutouts. To finish of Ive popped three pearls down the right hand side.

Tuesday 23 February 2010

Guess what I won a Free Digi Stamp from Praire Fairy

I was a bit stunned last night when I read one of my comments from Roberta from Praire Fairy she told me that I had won a Free Digi Stamp for displaying her button on my blog, so I promised her that I would create a card from the stamp and display it on my blog. So here we go this is the button I have on my side bar, and
Roberta is also going to give away a digi stamp to anyone clicking on your button and visits and buys stamps from her site, they will be eligible to go into the draw for a stamp to, so I would sincerely suggest that you not only pop over and visit her webshop but also display a button as well. Heres the link to her Shop http://www.prairiefairydesigns.com/cart/home.php I know you will love her stamps.


I chose this image, its called "Pokeing in Puddles" Ive printed it and coloured it with my Copic Pens then used one of the new Nestabilitie Label Dies, this one is Number 11 to cut it out, then created a mount from drawing around the edge onto blue card and cut it out by hand and layered it up with some foam tape. The sentiment is one I found on my computer by googling Quotes for puddles, I thought it was just right for this image.
My card is a 6"x 6" white card with a first layer of pale blue card, with one of three papers from the "Jumpin Puddles" from the Nitwit Collections, its an all over sentiment paper, then Ive used one of rain clouds and one of rain drops to create the other two mounts. Ive then stuck my mounted image in the centre and my sentiment to the bottom right hand side, I have put two brads through the punched holes at either end. Then stuck three blue pearls at the top on the right.

Saturday 20 February 2010

Just Magnolia Challenge - A Sketch by Jay Jay

This weeks Challenge from Just Magnolia is a Sketch by Jay Jay

and heres my interpretation of it

I have used one of the new Magnolia "Of the Ceiling stamps", and its one of Tilda with a sealing wax stick making a mess. Ive stamped her onto white card and then coloured her with my copic pens, after which I have used the Scallop Nestabilitie dies to cut her out and to create a mount for her out of blue pearlescent card. The sentiment is one that I created and printed of my computer.
The base card is a 8"x 8" white card, with a first layer of dark blue card, and two paper designs that I have used from the new Papermania pad, they are quite delft looking a beautiful flower design in two different combinations. I then stuck a piece of lace down over the seam.
The mounted image was stuck slightly to the left in the centre and my sentiment down at the bottom on the right. The flowers were created with my Retro flower punches, and then arranged on top of some punched out leaves. The butterfuly is one of the Nestabilitie dies then inked over the pattern to make it stand out.
We are still experiencing rough weather down here on the Welsh border, theres still a lot of snow around and its rather icy on the paths and road, lets hope the forecasters are wrong and the snow theyve been promising us doesnt appear, as Im so looking forward to warmer weather as Im getting a bit fed up with this white stuff.

Friday 19 February 2010

My Second GD Card for "Stampin for the Weekend" Challenge

This fortnights Challenge is being sponser by Di's Digitals and she has chosen a Sketch for this Challenge
Di is offering as a prize 5 of her gorgeous digi stamps, and I hope that you will pop over and visit her site and see them, if you click on her name (Di's Digital) it will take you to her website.

I have used one of Di's digi images this one is young Maisy with her dog, and Ive coloured her with my copic pens then cut her out with my Nestabililtie Oval dies, then mounted her onto a piece of red card, I also stamped the sentiment onto white card and mounted it in the same way.
The base card is a 8"x 8" white card and Ive used three of the Butterfly Kisses papers from Nitwit Downloads, Ive followed the sketch and then created three flowers from some of the left over papers and popped a pearl brad and a charm from the bottom one, then stuck to my card on top of some punched out leaves.
I want to thank Kimmi and her team for allowing me the priviledge of joining her DT team for this last month and tell her I have thoroughly enjoyed the experience. I also want to wish her good luck with her "Race for Life" in May, I sincerely hope that you will sponser her in this adventure and wish her good luck, if you likehttp://disdigidownloads.blogspot.com/ to see how you can do this click on this link http://poppy-petal-designs.blogspot.com/ and it will give you more information.

Thursday 18 February 2010

One Card for Two Challenges

Well Ive taken your advice girls and have stayed in and created my card for two Challenges, Mo's "Simple and White" and Cute Cards Thursday "Metal Mania". I dont know why my camera makes my photo's look so misty, it doesnt matter whether I use the flash or not, they still look rather washed out, anyway I am trying and its the same camera that I used for the photos in the post below, so somethings not right, its probably me.
Anyway Ive used this lovely dog image "Honey" for my card, its been printed out and coloured with my copic pens, then Ive used my Scor-pal board to emboss two lines around the edge of my image, and then mounted it onto a piece of white/cream pearlescent card.
The base card this time is a 6"x 6" white card, and Ive used a piece of white card and embossed it with the new Asian embossing Cuttlebug Folders, these are A5 size but arnt quite big enough for my piece of card, so I cut in on the diagonal then covered it with a piece of white braid.
The sentiment is one that I had in my stash, and Ive then cut it out with my heart Nestabilitie Die and made a mount out of the scalloped one and another piece of the same pearlescent card. The flower is made up with punched out white Retro Flower pieces with a pearl brad and spacer popped through the centre with a heart charm hanging of the bottom.

Oh No! More of the White Stuff

I feel so sorry for the birds, its actually falling quite thickly at the moment so I dont know how much we are expecting to get, but Im a bit fed up with it already. As you can see from the first one, its very dark at the horizon so I suspect we are in for quite a lot.

Wednesday 17 February 2010

Simon Says Stamps "Challenge" and Blog Hop


This my entry for the Simon Says Stamps Challenge, you have to use two papers, three embellishments and one image, and I think this will definitely suit the bill.
The answer to the blog hop question is "Happy Hoppers" so I sincerely hope that this is ok to do it this way. My card is a 8"x 8" white card with a first layer of yellow card with two papers from the Bearly Mine Extreme Designs Cd by Donna, and Ive also used a piece of punched out strip across the centre as a border. I then stamped a swirl and embossed it with gold embossing powder. Afterwards I mounted up my hedgies having a bath under the watering can on some green card and stuck it on my card towards the right, I should have said this image was coloured with my Faber Castell Polychromo pencils.
The flowers are Prima Hydrangea Petals with pearl brads and silver spacers, and before sticking them to my card Ive stuck a circle of punched out leaves, and hung a umbrella charm from the bottom one. The other two embellishments are the buttons at the top and bottom on my mount and the wateringcan on the left hand side.

Monday 15 February 2010

Cards For Men - Challenge Four - "Green"

Well we are now onto our fourth Challenge here at Cards for Men, and we are delighted with the response and delighted at the fantastic cards that you girls are creating, thank you so much for your support.
Anyway this fortnights Challenge has been sponser by :-


This is what Claire says about herself:-"SAHM with three children. Trained in Textile design at the Glasgow School of Art. Love all things handmade especially papercrafts. I love to doodle......and my doodles are available through Shop Handmade.. at this link" http://www.shophandmade.com/Store/Hopejacare

Claire has offered a very generous prize of 3 of her gorgeous digi stamps of your own choice as a prize for this fortnights Challenge, your card has got to be in all shades of "GREEN" it doesnt necessarily have to be created around one of Claire's stamps (but obviously it would be nice if it was,) and it must me suitable for man or boy.
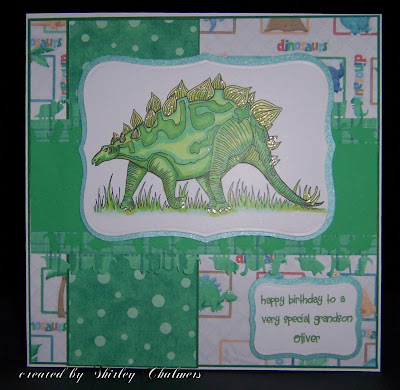
My card for this challenge has been created from one of Claires digi stamps, a Dinosaur and I decided it
would be ideal to create it for one of grandsons. Ive printed it onto white card and coloured it yet again with my copic pens and my Sakura glitter pen, then used my Nestabilitie label die to cut it out, and then used the die to create a mount for it by drawing around the outside of it then cutting it out by hand. The sentiment was created on my computer and cut out in the same way.
My base card is a 8"x 8" white card with a first layer of green card with one of four designs from the Nitwit Downloads, this one is called the Fabusaurus collection, and the first paper is an all over design of dinosaurs, for the second mount Ive used another piece of green card with a spotty paper and stuck this down my card. The third and fourth layers are one a check design and second a plain green paper, but for both of these Ive used a dinosaur punch from EK success along both edges, and layered them up and stuck them across the card in the centre.
The mounted image has been stuck on top of this strip and my sentiment at the bottom on the right.

Sunday 14 February 2010

Just Magnolia Challenge - "Love"

Ive created this card for this weeks Just Magnolia Challenge "Love", Ive used one of the images of Tilda thats probably from last years Valentine set, as it has her sitting down with a letter that has a heart on the back of the envelope, anyway Ive masked her of and sat her on the box of chocolates from this years set of stamps, then coloured them both with my copic pens. As its difficult to cut out this image without it over layering the edge of the mount, Ive cut around the heart lid and popped the Nestabilitie label die behind it. Ive also cut out the mount from pink card and popped them together with some foam tape. The sentiment is one of the Just Magnolia ones that Ive stamped at an angle and mounted it with the same label die cut.
The base card is a 8"x 8" white card and for the first layer Ive used a piece of pink card and a paper that was given as a freebie from my dear friend Lisa of http://allissa-designs.blogspot.com/ its a lovely all over paper with sentiments on in shades of pink. For the second layer Ive used one of three papers from the Nitwit Downloads, the first one is a lilac swirl paper, on which Ive used my looped hearts border punch on from Martha Stewart, and Ive used it again on another of the papers and this one has a small leaf sprig pattern on. After this Ive stuck a organza wide lilac ribbon around the centre of my card on top of this two layers.
The final mount has a gorgeous rose and flower pattern on, and Ive cut a strip of pink card and stuck this  down the centre of the card. Then positioned my mounted image on to this and my sentiment at the bottom. Ive popped some little pink gem hearts around, and finished of with two flowers that Ive created from some of the left over paper, and popped a pearl brad and spacer through the centres before sticking them to my card on top of some punched out leaves.

Just a Reminder of Sarah Hallam New Cds Program at 12 Noon.

Just a quick reminder that Sarah Hallam of Peerless Designs will be previewing the above cds on Create and Craft at 12 noon today, if you want to see my sample cards hopefully she will be showing them on there today as well, and if you really would like to buy either or both these cds, then your best and cheapest way of getting your hands on them is to visit Sarahs own website http://www.spanglefish.com/peerlessdesigns/ and she doesnt charge postage and packing either. With love and hugs Shirleyxxxxxx

Friday 12 February 2010

One Card for Two Challenges

Ive created one card for two challenges, Mo's "Pink, Red and White and include a Heart", and Cute Card Thursday "In the name of Love" and I thought I would combine the two and make the above. Ive used one of Mo's gorgeous images this is Shy Valentine Vanessa, shes so cute, Ive printed her out onto white card and coloured her with copic pens then used my circle Nestabilitie die cut her out, afterwards I cut out a scalloped circle in a dark pink pearlescent card to mount her onto. The sentiment is one of MSE stamps that Ive stamped and mounted in the same way as the mounted image.
My base card is a 7"x 7" white card and my first layer is dark pink card, with one of four papers that Ive printed from my Nitwit Downloads, this set is called Butterfly Kisses, it has a sentiment all over design, and for the further three layers Ive used my deep edged Heart punch by Martha Stewart along one of the edges then layered them up down the card. Over the bottom one Ive stuck a ribbon with Love printed on it.
I then mounted my image in the centre and my sentiment underneath to the right hand side. I also punched out two hearts that I stuck to the bottom left. I then created two flowers from some of the left over paper and hung a heart charm from the bottom one, before sticking them to my card, Ive arranged some punched out leaves in a circle and popped the flowers on top.
My camera seems to have made her rather misty looking I hope it doesnt cause you any problems with being able to see her.

I have a number of Awards to Pass On


Ive been so lucky recently to have received all these gorgeous awards from some of my very dear friends, and as Ive been so busy creating the sample cards for my friend Sarah and my DT work Ive just got very lapse in passing them on. Firstly I want to thank Rosi, Mi Sello, Lyn, Kimmi, Linda, Janette and Mandy for considering me for them in the first place, bless you all so very much, and thank you from the bottom on my heart.
The people I would like to pass them on to, is all you lovely followers who pop by my blog today until Monday morning, you are all welcome to take one of these as a reward for all your loyality and for the love and support youve given me over the last 16 months since I started blogging.
And I do mean PLEASE take one as my award to you all, dont be shy I want you to have one. With love and hugs Shirleyxxxxxxxx

Thursday 11 February 2010

Some more of Sarahs Samples

Here are the last 6 samples that I created for Sarah of Peerless Designs, and they will be shown on Create and Craft at 12noon this Sunday in her preview program, I do so hope you will be supporting her and enjoying the beautiful work she puts into her Cds.
I have just discovered if you are interested in obtaining both these cds, if you click on Peerless Designs  it will take you to her website where you can actually buy them pre-lauch for £27.99 free postage and packing. With love and hugs Shirleyxx

Wednesday 10 February 2010

Mo's Dream Team Challenge - Sketch

This card has been made to be entered for Mo's Dream Team Challenge, this has been set to find Guest Team Designers who will be asked to create cards for a month, a sketch has to be used to design your entries to. If you click on the link it will give you more information.
I have used Mo's "Kai playing in leaves" image and printed it onto white card then used my copic pens to colour it. Its been cut out in a circle and mounted onto a piece of green pearlescent card. The sentiment is one of Pink Gems which I have also cut out in a circle and mounted onto a Nestabilitie leaf die cut.
The base card is a 7.50"x 7.50" white card and on this I have layered up a piece of green card, with one of two papers that Ive printed from the Nitwit Downloads, they have come from the Autumn collection. The first paper is a patchwork one and on top of this Ive layered up the second mount also onto green card a pretty leaf spray pattern, then stuck it down the card.
Ive then positioned a brown ribbon across the middle and mounted the image in the centre, with the sentiment to the right hand side at the bottom. To finish of Ive used several leaf buttons and a acorn down the right hand side at the top and across the bottom on the left.

A Gem of a Challenge - 1st one a Sketch

Todays card has been created for the "A Gem of a Challenge" its their first one and its a sketch. The image Ive used is Max the Spaceman by Pink Gem, Ive stamped him onto white card and coloured him with my copic pens, then cut him out in a oval shape, then mounted him onto a piece of dark pearlescent card.
The base card is a 8"x 8" white card with a first layer of dark card and one of three papers from Nitwit Downloads called Spaced Out, Ive arranged it into three and put the papers into these partitions, and stuck some ribbon down the devisions. Ive then stuck my mounted image in the left hand one, and my sentiment in the centre, this is also one of Janets new stamps.
To finish of Ive used some of my alien buttons and spaceships, and a few stars down the edge.
As promised two more cards, the accordian fronted one, has two pictures so I thought you like to see both. With love and hugs Shirleyxxxxxx


Tuesday 9 February 2010

Sarahs New Cds Cats Whiskers and A Dogs Life

As promised last week I am going to post some of the samples that I created for Sarah Hallam of Peerless Designs, she is going to use them in her preview program on Create and Craft on Sunday 14th February at 12noon. The two cds cover our pets, one for the dogs and one for the cats, they are both equally gorgeous and have many design sets, which include toppers, inners and outies, ribbons and tags, backing papers, inserts, envelopes and lots of extra's Ive just chosen six design sets from each of the cds and created my cards from them. If youd like to click on her name it will take you to her website where you can buy them directly from her from next Monday free postage and packing, and lots of other cds thats shes created in the past.
These are the first of two that Im going to post today and will post another two cards tomorrow.  I sincerely hope that you will enjoy seeing them and maybe even consider buying her cds in the future. With love and hugs Shirleyxxxxx

Monday 8 February 2010

Just Magnolia Challenge - A Easter Basket

Well this was a challenge and half, although the basket was a Just Magnolia Tutorial, I still found it fiddly to make, if youd like to see how its made just click on the link and it will take you there.
Anyway Ive created the basket from a piece of 12"x 12" piece of paper and once you cut into strips you distress the edges, and the tutorial will show you how to weave them together and create the basket. After creating it, Ive jazzed it up with some ribbons and roses that I bought from Tab.
The Tilda image was stamped onto white card and coloured with my copic pens, after this Ive punched it out with my Oval Nestabilitie die, and then created a mount for it from some pink pearlescent card and a Scalloped Nestabilitie die. Ive stuck it to the handle with a ribbon bow stuck at the top. To finish of Ive filled the basket with some little chocolate eggs. My hubby is now going to polish them of as hes concerned they will get sticky, I think he just making excuses, what do you think?

Sunday 7 February 2010

Mo Mannings Challenge - Wood or Would

Morning Ladies, todays card has been created for Mo's Challenge this week "Wood or Would", I think this for me has been extremely challenging one and I felt this was a very appropriate image but didnt really lend itself to making a card with, but Im hoping by fudging this sentiment it might just make it.
Ive used Mo's Red Riding Hood image and have printed it out onto white card and coloured it again with my copic pens, after which Ive mounted it onto a piece of brown card and then onto a embossed mirri board. The sentiment was mounted in the same way.
The base card is another of my infamous 8"x 8" white cards with a first layer of embossed silver mirri board and a first layer of brown card, with a printed a wood paper and then punched out the corners with my maple leaf corner punch, on top of this I have layered up two layers of leaf papers and have punched all around with the same maple leaf punch and used the border one as well, these were then mounted on top of one another and the a piece of brown and gold organza ribbon was stuck across the centre and attached at the back.
The mounted image was then stuck in the centre and my sentiment at the bottom on the right hand side. To finish of I have created two flowers from some packet ones and a sparkly brad was threaded through the centres, and before sticking them to my card, Ive arranged some punched out brown leaves on my card and popped the flowers on top.

Saturday 6 February 2010

Cute Card Thursday Challenge - Spots and Dots

Morning Ladies, hope you are all ready for a lovely weekend, todays card is entered for the Cute Card Thursday Challenge, and this week its "Spots and Dots" and is being sponsered by Phindy's Place, she is another creator of Digi stamps and is also a illustrator of childrens books. I would urge you to pop over to her Etys shop http://www.etsy.com/shop/phindysplace and see what gorgeous stamps she has to offer.
Ive printed my stamp onto white card and coloured it in my usual way, with my copic pens, then cut it out and run a blue pen around all the edges, I then printed a sentiment from my computer and did the same with this, and afterwards mounted them both onto a piece of blue pearlescent card.
The base card is my usual 8"x 8" white card with a first layer of green card with one of four spotty papers from my Nitwit downloads, it took me a time to find them as they were in all different folders, but felt these were the best I could find amoungst them. Ive mounted  the first a green and small dot onto this first layer, and the second a small blue Ive punched a square with my border and corner punches, and the third and fourth mounts are two more papers mounted onto different coloured mounts. The last mount is piece of dark blue card run through my cuttlebug with a circle embossing folder.
Then I mounted my stamped image in the centre with some foam and my sentiment at the bottom on the right hand side.  

Friday 5 February 2010

My First Guest DT Card for Stampin for the Weekend Challenge

Well guess what Ive been asked to be a guest Designer Team member for February for "Stampin for Weekend" Im really delighted and thrilled to be taking part. This fortnights challenge is "Valentines" and Simon Says Stamp is sponsering this challenge and offering a prize of a $25 gift voucher so I sincerely hope that you will take part in this challenge.
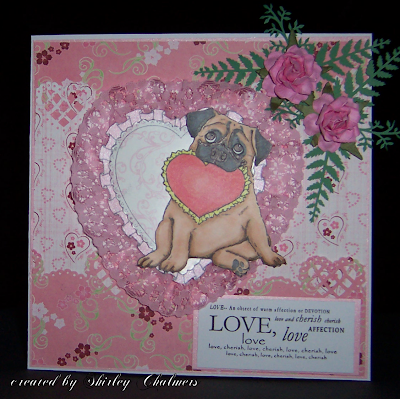
My choice of design is another of Mo Mannings gorgeous digi stamps, this one is "Pug Puppy with Valentine"and felt it was just right for this Valentine challenge, Ive printed it out onto white card and then coloured it with my copic pens, after which Ive cut it out completely. The sentiment is one by do crafts stamps and Ive stamped this onto white card and cut it out as well then mounted it onto pink pearlescent card.
The heart itself is another stamp, that Ive stamped onto the same pink pearlescent card then cut it out as well, on top Ive used a piece of flourish printed card which was also stamped with the same heart, this was then cut out and mounted on top of the pink one. Ive then stuck some pink lace around them both.
The base card is a 8"x 8" white card with a first layer of pink card with one of two paper designs from Making Cards magazine, Ive used the deep edged heart border punch by Martha Stewart on the edges and layered it up in three strips one on top of the other. Ive then stuck my heart in the centre and mounted the pug on top with some foam tape. The sentiment was then stuck to the bottom on the right hand side.
To finish off Ive used two roses and some punched out leaves and arranged them at the top on the right.

Thursday 4 February 2010

How about a Change?????

"Anyone for Tea?" this is our 18th month old granddaughter Danu, offering her granddad a cup of tea, isnt she gorgeous? I thought youd like a change from my normal postings, this was taken last Sunday when my hubby went to visit his daughter and granddaughter. Shes certainly got a jazzy dress on and her brand new shoes, like all little ones, she didnt want to take them of, and hasnt even bothered to wear any socks, just hope she doesnt get any blisters for not doing so, I know I would.
Anyway just thought it would make a change hope you like it. With love and hugs Shirleyxxxxxxxxx

Tuesday 2 February 2010

Sir Stampalot Challenge - "Moving"

I decided to have a try at Janice and Andrew's, Sir Stampalot's Challenge "Moving" I want to wish them an even bigger success in their new premises, Ive been a customer of theirs for quite awhile and Ive found them one of the best companies to deal with, they are very helpful and will go out of their way to do so, and their turn around service is one of the best in the country. Also I want to thank Brenda for a fabulous Bloghop she arranged and carried out.
I have used one of Mo's delightful digi images, this one is called "Moving" and to be honest what parent hasnt had one of their little ones say they are leaving home, I certainly have and this is so appropriate for this challenge. Ive printed it out onto white card and then coloured it with my copic pens, after Ive cut it out and distressed the edges with a pale blue inkpad then mounted it onto a piece of blue card. The sentiment was designed and printed from my computer and was also mounted onto a piece of blue card.
The base card is a 8"x 7.50" white card, and for my first layer Ive used a dark blue card and one of four pattern papers again from the Nitwit Downloads, this one is a dark blue with a circle swirl pattern on, the second, third and fourth layers are made in smaller strips and Ive used the train edge border punch then layered up across the centre of the card. Then I mounted the mounted image in the centre and the sentiment was positioned at the right hand side at the bottom.

Monday 1 February 2010

Exploding Birdhouse

Hi Janet you were asking about the two Apex ends of my birdhouse, as you can see they are at opposite sides of this exploding box, sorry I didnt mean to mislead you, and I sincerely hope that this helps.
I apologise for the slightly bend ends as it arrived back in the parcel slightly twisted.  Ive now decided to post the outside of the exploding birdhouse for you to see the whole thing when it has the top on.